Become a Member

Get access to more than 30 brands, premium video, exclusive content, events, mapping, and more.

Already have an account? Sign In

Become a Member

Get access to more than 30 brands, premium video, exclusive content, events, mapping, and more.

Already have an account? Sign In

Brands

Training and Exercise Tips

Achieving Symmetry

Heading out the door? Read this article on the new Outside+ app available now on iOS devices for members! Download the app.

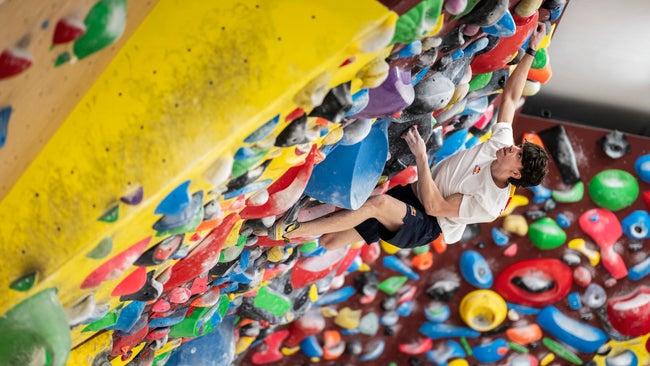
Leah Crane climbs the mirror-image of the same problem on a symmetrical wall. Photo Liam Lonsdale

You’re already experienced in training through bouldering, campus boarding and hangboarding. What next, then, to raise your strength to the next level? Try symmetrical training.

The concept is to address weaknesses by training on a steep woody board or wall on holds arranged in a symmetrical pattern, working the same combinations of muscle groups on both sides of the body.

Symmetrical training has two main subsets: use of a system wall with problems made of one type of hold, such as all underclings; and use of a symmetrical wall (somewhat confusingly, this has the name as the overall training type, but means a particular setup on a wall), each side of which contains all of the same holds as the other, in reverse orientation. Both provide great options for home-training facilities.

Symmetrical training is geared largely toward those climbing in the mid V-grades and above; hence the suggested wall-angle range is 30 to 50 degrees. Those climbing in the lower grades are advised to stick with conventional bouldering until you feel you are no longer progressing.


1. System Wall

System training was developed in the mid-1990s by the German legend Alex Huber in preparation for a string of 8c+ /9a (5.14c/d) first ascents such as Om, Open Air and La Rambla. Twenty years on, system training remains one of the most effective methods for working weaknesses or targeting specific goals. The objective is not so much to do a problem, but to train the muscles. Most boulder problems feature a variety of holds and moves, which means that the load shifts slightly between different muscles as you climb. By contrast, the system layout features problems that use all the same holds, which are laid out on a uniform, repetitive grid. This uniformity targets particular kinds of moves or lets you practice using certain kinds of holds (such as pinches, slopers, undercuts or gastons) intensively and repetitively. At first you might think the system- training setup doesn’t apply to real climbing, but in fact rock frequently follows consistent patterns; for example, the crux of my latest project at Malham Cove in the U.K. involves seven hard moves in a row on underclings, and at many crags the majority of the holds are all pockets or crimps and so on.

System Layout

To set up your system trainer, start by grouping holds on a climbing wall into styles and then position them, ladder-like, on a pre-marked grid. You can use one fixed distance for the reaches, or, for more versatility, place holds closer to each other so you have the option of adjusting reach length. The main types of handholds to use are flat edges, pockets, slopers and pinches, and the range of orientations are flat holds, sidepulls, gastons and underclings. If you have space, it’s good to have two different size options for the holds that are most relevant to your goals. For footholds, use two or three different sizes, color-coded for identification. It takes planning to ensure that the foothold tracks correlate to all the different handhold tracks. You can make the problems harder either by reaching further between the handholds, switching to smaller footholds or adding weight. To allow room for improvement, configure the problems so you need to use the largest footholds with the smaller handholds, then progress to the smaller footholds as you get stronger.

System-Training Tips

Perform the moves with your hips parallel to the wall, using the inside edges of your shoes. Drop-knees, stepping through, toe-hooks and heel-hooks are all banned—no using technique to cheat and make it easier! This limitation can feel contrived and contrary to the principles of climbing, but it’s the way to go for strength improvements. Avoid the more efficient method of climbing straight-armed, and instead pull in and work your arms through a full range of motion.

Start your sessions with the moves that are most specific to your weaknesses or goals, whether that means using slopers, underclings or anything else. Train using maximum effort, resting well in between exercises to maximize quality. Calibrate the difficulty of each problem or exercise so that at first you can barely do individual moves, then work at the problems until you can do them two or three times with rest in between; then make them harder, and repeat the whole process. Rest two to five minutes between attempts, depending on how many moves you do and how far you get. The number of attempts you make will depend on how many problems you intend to try, but rough guidelines are to attempt five or six different problems, spending 12 to 15 minutes on each one, or three or four problems, spending 20 to 25 minutes on each. The main principle is to give each problem your absolute best and to move on as soon as you detect the slightest deterioration of your strength levels. Always take a short break of eight to 12 minutes between each problem.

You can also perform system-style static exercises by holding static positions on the board, as if deadhanging, but using your feet. This is a great way to hone in on weaknesses and build strength within a range of a movement. For example, if you really need to be strong on underclings at 90 degrees, then hold that position. Use similar hang times as for deadhanging (i.e., two to 10 seconds). Other variations include eccentrics, where you load up with a weight belt to climb, or you pick a position that you can’t even hold for a second and try to lower yourself slowly, resisting the forces. To improve lockoff strength, hold each lock and hover over the target handhold for a few seconds. For increasing core strength, deliberately cut your feet loose, in a controlled way, between each move, then replace your feet. A final option is to try the problems footless to work purely on power, without training core strength. Note that system training can also be combined effectively with campus boarding or fingerboard work if you reduce the number of problems or attempts accordingly.


System walls feature ladders of the same types of hold, such as all pinches or underclings. Alex Johnson demos a system wall, above and in a video on rockandice.com/system-training. Photo the RV Project

2. Symmetrical Wall

Symmetrical walls are a mutation of the original system- training concept. The earliest designs were showcased by the British boulderer Dan Varian, designer of the wooden Beastmaker training system. These walls are essentially a cross between a system wall and a classic random-style woody board, combining elements of both. The holds are not laid out in ladder tracks but grouped in identical pairs. The wall is then set up so that one half provides a mirror image of the other, with any hold that appears on the left-hand side set at exactly the same position and with the opposite orientation on the other side.

Compared to the system layout, the moves vary as opposed to following consistent themes. The wall lends itself more to doing normal freestyle boulder problems, but with the option
of climbing the same thing in its mirror image. If you’re designing your own facility, you can get the best of both options by mixing a few system-ladders in with the symmetrical layout.

Symmetrical Training Tips

The same overall approach for system training applies, i.e., maximize difficulty and quality by trying problems at your limit with good rests in between.

There are two variations in working these kinds of problems. One is to wait until you’ve completed a problem before moving on to attempt the mirror image, and the other is to work both versions at the same time. The first option makes for exciting training as, once you’ve completed the first version, it can be a shock to discover how much harder the mirror image feels. Yet you can then set yourself the challenge of completing it more quickly, armed with the beta tricks you’ve picked up. However, purely from a strength-building perspective, it’s more efficient to work both versions simultaneously. It doesn’t make sense to strengthen one side of the body in a series of positions without strengthening the other side. This would be rather like doing sets of dumbbell curls with your right arm for two weeks and then with your left arm for the next two weeks; to an extent, the gains on one side will be lost as you work on the other.


This article appeared in Rock and Ice 240


Also Read

How Much Should You Train

From 5.10b to 5.12